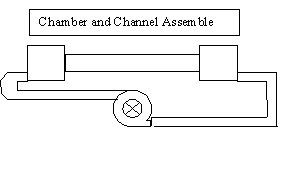
1)
1 Fully
assembled flow chamber and channel.
2)
1 Small
water pump.
3)
1 Air
source pump.
4)
2 flow
control valves
5)
Plastic
hose
6)
Silicon
1)
Shut the flow control valve behind the water pump.
2)
Remove the hose connected to the pump side of the valve and place into
water source.
3)
Open the flow valve in front of the pump and turn on pump.
4)
Fill test channel to desired water level.
5)
Turn off pump and shut front flow valve.
6)
Reattach hose to the rear control valve.
7)
Attach Flow meter to the front control valve on the opposite side on the
pump.
8)
Fully open the rear control to allow the fluid to flow freely through the
pump.
9)
Use the front valve to regulate the flow rate of the fluid.
a)
The flow meter will provide the flow speed.
10)
Run water through the
assemble to see if there are any leaks.
a)
Use the silicon to seal any leaks.
Testing flow pattern in this apparatus can be accomplished in a few different ways. Two of these experimental processes are discussed below. They are water and air flow in the same direction and water flow with air counter flow.
1)
Follow setup steps above.
2)
Connect an air source to the side of the chamber that is being used as
the front.
a)
Note: The front is denoted
as the side that the pump send water to.
b)
Note: The chamber is built
symmetrically. Either side of the
total apparatus can be used as the front.
3)
Set pump to provide a water velocity needed to produce the same
Reynolds’s number as the fluid it is modeling.
a)
Note: For liquid helium, the velocity setting should be between .05 and
.2 (m/s)
4)
Turn on water pump and air source.
5)
Observe any waves that are created on the surface of the water.
a)
Make note of the velocities used during the experimental run.
6)
Shut off the flow of the water and air.
7)
Disconnect the air hose and introduce the Kallirascope.
a)
Kallirascope: sparkling material used to view the movement of fluid
within the flow.
8)
Reconnect the air hose.
9)
Repeat steps 3-5 for different velocities.
Warning:
Make sure that both of the flow valves are open in
some degree or another when the pump is running. The chamber and channel assemble is air tight so pressure can
build up to failure levels if the one of the valve are closed during the
experiment.
1)
Attach the air flow hose to the opposite side of the chamber as the first
experiment.
2)
Follow the steps used in the same direction flow experiment.